Wednesday, 17 October 2012

A sunny weekend in Yorkshire!

Even if you're really busy, (and I mean REALLY busy!) it is important to have time off - to relax and recharge and to avoid mental, physical and creative burnout.

But if you're that busy how can you make the decision to stop?

I personally find this really difficult - especially in the 4 month run up to Christmas as my life and my business gets more and more hectic...

But at the weekend my in-laws came to stay (and apart from a few times when I couldn't resist checking my emails - 'just in case') I managed to resist doing any work at all for 4 whole days!

During the weekend, the sun shone, the sky was blue and Yorkshire looked fabulous!
 
And so - for no other reason than I had a lovely and relaxing time taking them, please find below a selection of my favourite pictures from the weekend!


All of these photos were taken with the vintage camera app on my phone when we visited

Monday, 8 October 2012

Monday Makeover - Red Felt Poppy Corsage Pin

Traditional Style Red Poppy Corsage
Not really a craft makeover in the usual sense, more of a style reboot...

The traditional style made by lolly red felt poppy corsage seems to be as popular as ever; selling well online through my Folksy and Etsy shops, at events and exhibitions and flying off the shelves quicker than I can make them for The Gift Gallery York!

But... it has been in production for over a year now, so I thought it was time that the red poppy brooch pin had a brand new look for Autumn/Winter 2012.

As you may know, the new season stock has been heavily inspired by the bold colours and repeating patterns often found in Folk Art. Many of the new designs feature contrasting colours with clean and simple outlines.

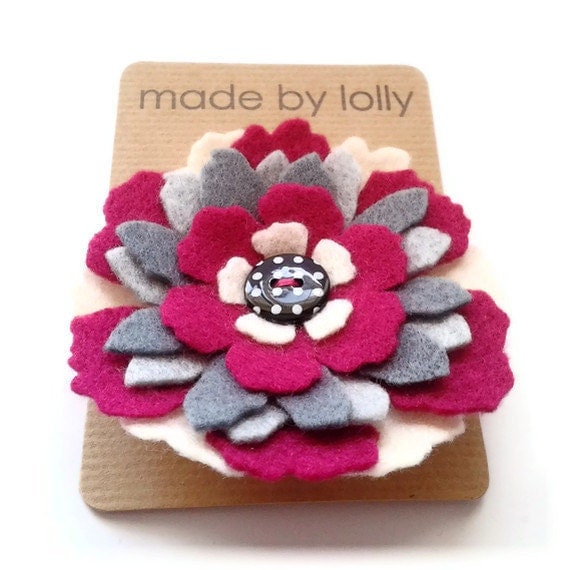
Although there have been lots of new designs this year, my absolute favourite folded felt corsage is the Folk Art Daisy, and so it was this design that I used as a starting point when I thought about re-working the red felt poppy corsage...

And this is the result:


My bright red felt poppy corsage pin has had a retro makeover!

Super sleek, with a clean and simple design, the retro re-boot of this item is proving as popular as the original! Featuring four folded petals made from bright red felt, the centre has been decorated with hand stitching and beading which is finished with a bold polka dot black and white spotty button.

Ever so slightly smaller than the traditional style, the retro poppy corsage measures approximately 7cm in diameter x 2.5cm deep but size isn't everything and I think it is as eye catching as the original!

I am so pleased with the new design, and think that for now at least, it is my new favourite!

Both the traditional and the retro style red poppy brooch are available online from the Folksy and Etsy shops, and will be coming to my next event at Mary's Marvellous Vintage and Craft Market in Sheffield...
 
But for now, the big question is... Which do you prefer?!
 
(I really would love to know! ...please feel free to leave a comment below)

Thursday, 27 September 2012

Now you're Two - Happy Birthday to the Gift Gallery!


Happy Birthday to you,
Happy Birthday Dear Gift Gallery...
Happy Birthday to You!

I just wanted to pass on my very Best Wishes to The Gift Gallery York who are 2 Years Old today!

The Gift Gallery is one of the most lovely shops I have had the pleasure of visiting, in that in only sells handmade items produced by a range of designers and craftspeople from across the UK and Ireland (including my felt accessories!)

Kate and her small team of friendly staff have been fantastic supporters of the handmade scene, and have been some of the loveliest, not to mention most professional people I have had the pleasure to work with.

So I hope you'll join me today in saying a very Happy Birthday to The Gift Gallery York!

Hip, Hip Hooray!  - here's to many more years of success!

If you are in York today, it would be grand if you could pop in to say hello - but if not, please feel free to leave The Gift Gallery York a message on their Facebook Wall or on Twitter

Monday, 17 September 2012

Monday Makeover - Upcycled Picture Frame Message Board

Today's Monday Makeover is a very simple craft tutorial!

It just takes 3 items,

3 minutes,

and can cost less than £3!

It's also perfect if you'd like to make yourself a new memo board but don't fancy having a go at the
DIY Chalkboard Paint from last week!


The 3 things you will need to create an upcycled picture frame message board:

1. An old picture frame with the glass still intact
2. An interesting piece of paper or fabric the same size as the frame
3. A chalkboard pen or dry-wipe marker pen

The 3 steps to follow to create an upcycled picture frame message board:

1. Remove the old picture from the frame, and clean the frame and the glass thoroughly
2. Place your new picture/paper/fabric into the frame behind the glass and replace the back
3. Decide where to hang your new picture frame message board and what to write on it!

Told you it was simple!

I use my frame to record very important messages:


What might you use your DIY dry erase picture frame message board for?
As always, comments welcome!


Saturday, 15 September 2012

Ideas and Inspirations: Fashion Trends

As a designer/maker, how important is it to follow the latest trends?

This is a question I have been pondering - because, as a designer/maker of felt accessories I have to acknowledge that my items will be worn - and in order to create a successful business, I have to ensure that those items will want to be worn by as many people as possible!

But does this mean I should blindly follow every fad, jumping on the latest fashion bandwagon no matter what direction it's heading in? With the newest fashion trends being shown at London Fashion Week, it seemed that now was as good a time as any to ponder this question!


As luck would have it, Chappell Ellison has been pondering the same thing - and her recent article on the Etsy blog has some interesting ideas to consider. As she points out, following the herd and giving the customer what 'they-think-they-want' can be very lucrative!

But I'm not sure that it's the creative path I'd like to take.

Firstly it's not really in my nature to follow the latest trends (I will stubbornly refuse to read a book or watch a film if I think it's been over-hyped!) and secondly I'm not sure that the current popular trends (which as far as I can tell from my extensive research on Pinterest are 'ombre', 'chevrons', furniture made from wooden pallets, DIY chalkboard paint and if you're from the UK, owls on just about everything!) are appropriate matches to folded felt flower accessories!

So, I have been saved from hitching my business to the fashion bandwagon, because for the moment at least, the trends do not coincide with my own ideas. But is there a way I can still use fashion to my advantage?

I have recently started to use the website Polyvore
If you're not familiar with the site the easiest way to describe it is a 'wardrobe creating tool'. It is similar to Pinterest in that users can upload pictures of items they like, but really that is where the similarity ends.

Funky Folk
The collection shown above is called 'Funky Folk' and features my Folk Art Daisy Corsage The rest of my collections can be found here

Rather than collecting individual pictures into a folder, Polyvore allows you to drag the different pictures onto a canvas to create a fashion 'set' - similar to the clothing combinations that are found in fashion magazines. It's great fun, and a really visual way to build a virtual wardrobe.

In one of my collections I have only included designer items - creating a wish list that could only be purchased following a HUGE lottery win! But then I thought that it would be useful to create a range of 'sets' to show other Polyvore users how my felt accessories can be incorporated into different outfits. (And the great thing is, once my pieces have been uploaded onto the site, other users are then able to use them in their own sets and share them with all their followers!)

I'm hoping that by using this site, I will be able to engage directly with shoppers, share my accessories with a wider audience, and show how my items can be incorporated into many different outfits regardless of whether you are a trend setter, a fashion follower or perfectly happy with your own personal style!


But what do you think?
Have any of you ever used Polyvore?
Do you think it could be a useful tool to be used by small business?
Or is it just a bit of fun?

I'd love to know your thoughts!

Sunday, 9 September 2012

How to make your own chalkboard paint - UK Instructions!

A DIY Custom Colour Chalkboard Chicken!
As you may have gathered from lots of my previous posts - I am now seriously addicted to Pinterest!

I mostly use it for ideas and inspiration for made by lolly - but thanks to the huge diversity of 'pins' available, it is also really easy to find lots of hints and tips for other subjects - including craft tutorials. The DIY craft tutorial that pops up most often is the 'How to make your own chalkboard paint'

The majority of these pins take you back to blog posts written by DIY craft enthusiasts in the US who have all had a go at making chalkboard paint for themselves. Every single one of them has a slightly different recipe, and different hints and tips - but the one thing that unites them is the fact that it actually seems to work!

So... I thought I might have a little go myself...

The most common recipe for DIY chalkboard paint appears to be taken from Martha Stewart's website and can be found here: Custom Colour Chalkboard Paint But for my attempt at DIY I wanted to combine this basic recipe with all of the hints and tips that I had found - and convert it for a UK audience!

So... Here is the incredibly simple made by lolly recipe for DIY chalkboard paint:
Powdered Tile Grout, Water, Acrylic Paint : MIX : PAINT
In case that's just a little too minimalist for you,
I have also written out a slightly more detailed recipe:
1. This chalkboard paint is made in the ratio of 1:10
e.g. for each measure of tile grout you will need approximately 10 measures of acrylic paint. For my sample pot I used half a teaspoon of tile grout (2.5ml) and 25ml of paint - for larger amounts just increase the quantities
2. Use 'unsanded' tile grout
I used Wilko White Tile Grout which cost just £1.40
3. To avoid lumps, mix the tile grout with a few drops of water before adding the paint, then stir well
The final colour of the chalkboard paint will be a little lighter than the original colour. If you want a very vibrant colour chalkboard paint then make sure you start with a good quality acrylic paint with a high level of pigment!
4. Ensure the item to be painted is clean, dry, dust free and suitable for painting
i.e. some surfaces, such as laminate wood may need to be painted with a suitable primer first
5. Use a roller to apply the paint in thin layers to avoid brush marks
I found my paint dried very quickly and  I could re-paint a second and third layer almost immediately
6. Wait at least 2 hours for the paint to completely dry
At this stage you my wish to lightly smooth the surface using sandpaper - but I found that this wasn't necessary with the items I had painted
7. 'Condition' the surface by rubbing the whole area with chalk, then rub off!
Use a damp cloth if necessary
8. Think of silly messages to write on your new chalkboard!
You should be able to use both traditional chalk and chalkboard pens on your newly painted chalkboard!

EDIT: Since I wrote this blog, I have found some really fab tips for how to draw like an artist on a chalkboard on the 'inmyownstyle.com' page. Click HERE for the link!
 
Once you've had a go at making a small sample - why not try something a little bigger...

A terracotta plant pot decorated with it's own chalk paint label?
A chalk paint memo board on one of the kitchen cupboards?
A giant chalkboard painted directly onto a child's bedroom wall?

Once you start looking, you'll be surprised at what uses you can find for chalkboard paint!

Please feel free to use my chalkboard paint tutorial to create some projects of your own! I'd love to know what you use it for!

Leave me a comment below if you think you might try this for yourself!
Related Posts Plugin for WordPress, Blogger...