Thursday, 2 May 2013

Salt Dough Experiments - Coloured Salt Dough

Last week I had my first ever experience of salt dough.

Hard to believe, but true!

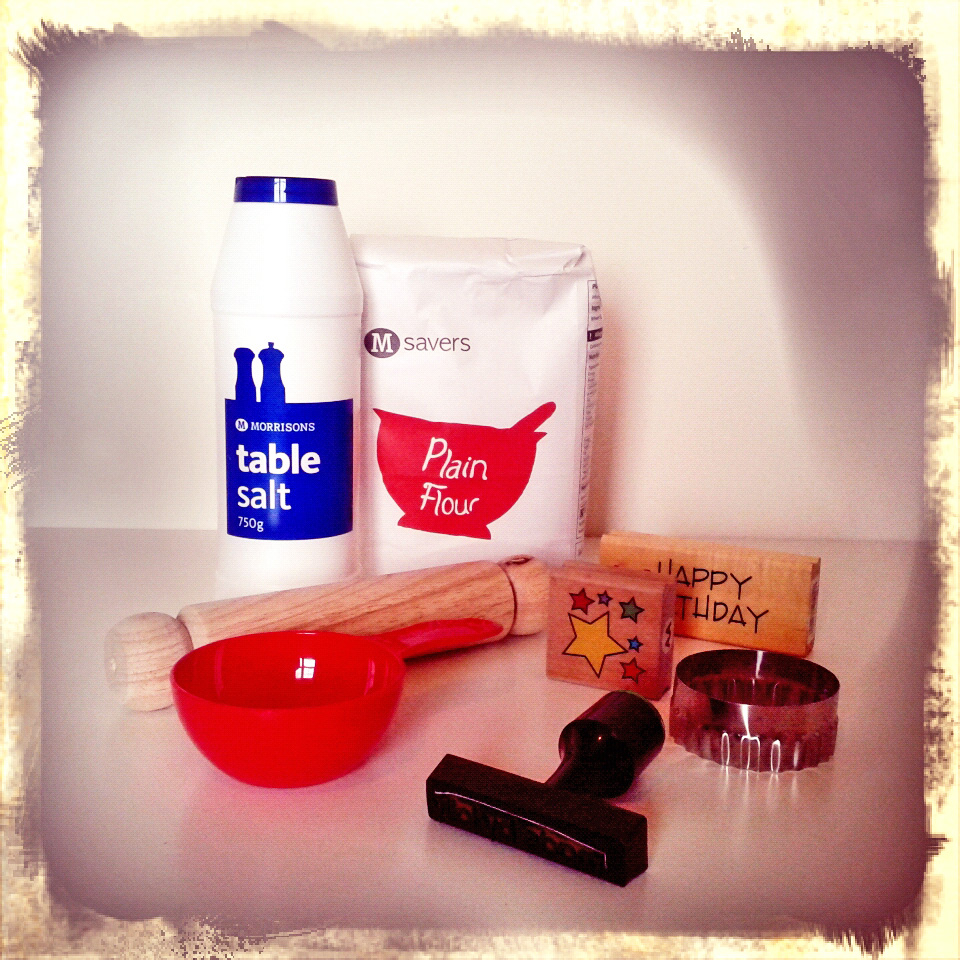
I started off with a basic salt dough recipe and some basic tools and equipment. The results were varied to say the least, but I didn't allow the lack of instant success to put me off!

According to my extensive research there are many different ways to vary the colour, texture and decoration of your salt dough ornaments - including oil, lemon juice, wallpaper paste, tea, coffee, paint, lace, stamps, buttons...


I haven't had time to try them all, but here are some of the results from my salt dough experiments:

How to make salt dough easier to handle
  • Add a few drops of vegetable oil to the basic salt dough recipe This will help make the dough soft and silky, and easier to knead    
  • Try not to add too much water. The salt dough should be soft and pliable, but never sticky otherwise it will be difficult to handle
  • Make sure you knead the salt dough for at least 5 minutes. The softer and smoother that your basic salt dough is, the better your finished items will look!
  • As I was making small and delicate items, I found it easier to work with only 1/4 of the dough at a time. Store the leftover salt dough under a damp cloth until you need it.
  • I covered my work surface with greaseproof paper to make it easier to move the dough after rolling out

Using coffee to make coloured salt dough

  • Add some coffee granules to a small lump of salt dough. Knead and manipulate the dough until the coffee granules have all blended into the dough (1.)
  • If you want a mottled effect, press more coffee granules into the surface of the salt dough (2.)
  • If you want a marbled effect, manipulate the dough until the coffee granules have only partially blended in (3.)
  • If you want a darker, solid colour, add much more coffee and knead very well to ensure the colour is evenly spread throughout the dough (4.)

Using acrylic paint to make coloured salt dough

  • Add some acrylic paint to a small lump of salt dough. Knead and manipulate the dough until the paint has blended in (1.) (You may want to wear gloves and protect your work surface during this stage as it can get messy until the paint has all mixed in!)
  • If you want a marbled effect, manipulate the dough until the paint has only partially blended in (2.)
  • If you want to add extra colour and texture, why not try adding some coffee granules to the coloured salt dough (3.)
  • Once rolled out the combination of the marbled paint and the coffee granules gives an amazing effect! (4.) 
I'm amazed by the results that can be achieved just by adding a few simple things to the basic dough - and somehow, I think that there may be many more things I have yet to discover about salt dough!

I'd love to know if you have any salt dough recipe recommendations, or any ideas for future projects...

Please feel free to leave a comment below - and who knows, 
it may inspire me to write a blog post about it!

Friday, 26 April 2013

How to Make Salt Dough - Basic Salt Dough Recipe

I'm just gonna say it.

Up until 2 weeks ago, I'd never made salt dough before. Hard to believe, right?

I can hear you asking...

"...Surely you had your first experience of salt dough was at pre-school, making jolly Christmas ornaments"
"...Maybe it was a rainy day activity that you tried with your younger brother?"
"...Well then, you must have made heart shaped wedding favours with your girlfriends?"

Nope! Not me.

A week last Sunday I found myself with an empty sewing basket, a tidy(ish) work room and some creative time to kill. I'd found a salt dough tutorial (by The Cheese Thief) that had been pinned on Pinterest (See the original tutorial here) and thought to myself.... I could do that!

And it turns out that salt dough is very easy to make, very cheap to make, and great fun!

So in case there is anyone out there that has never made salt dough ornaments before, here is the very basic salt dough recipe:

1 cup flour | 1/2 cup salt | 1/2 cup warm water

Mix everything together in a bowl

Knead the dough for at least 5 minutes to ensure all ingredients
are well mixed. 

You are aiming to end up with a dough that is soft and pliable, but not sticky. The longer that you work the dough, the easier it is to 
handle and the smoother the end result will be

PLAY!

Try using cookie cutters, stamps, inks... 
Why not try moulding the dough into 3D shapes?

Once you have finished, place your pieces on some greaseproof/waxed paper and allow to air dry for at least 3 days.

BE PATIENT! Try REALLY hard not to keep touching them and picking them up during this time. Salt dough can become brittle, 
and the more that you handle it as it drys, the more likely it is to snap.

Once your pieces are completely dry, (and this may take longer than 3 days....) you can smooth the surface with an emery board or some fine sandpaper, before varnishing them.


That was the basic salt dough recipe.

Perfect if you want simplistic and rustic salt dough ornaments. But what happens if you want something more sophisticated? Or want to add colour or decoration to your salt dough?

According to my extensive research (my thanks to Pinterest and Google!) there are many different ways to vary the colour, texture and decoration of your salt dough ornaments. Oil, lemon juice, wallpaper paste, tea, coffee, paint, lace, stamps, buttons...

There are so many salt dough variations waiting to be explored!

Check out my next blog post to see the results of my adventures with salt dough variations

OR...
maybe you might find some inspiration on my Pinterest board:


Friday, 19 April 2013

Feedback Friday

Welcome to my first ever Feedback Friday!

Working for yourself can often be great - you can listen to whatever music you want, stop for a brew whenever you want... and more importantly you can design and make whatever you want!

But although this creative freedom can be very liberating, I still need to make a profit from selling the items that I design and make - so finding out what people want is very important.

However - it's not always easy to second guess what my customers might like to buy. So instead of guessing, I thought it might be a good idea to just ask!

And so here it is. 
 
'Feedback Friday' 

My chance to ask you what you think of one of my new plans, projects or products
Your chance to feedback what you really think!


Feedback Friday 19/04/2013
Potential New Product: Pin Badges


Based on my most popular designs
Sold in packs of 4 for £3.50
Manufactured in the UK

Do you think they would sell?
Would you buy them?
What designs would you like to see? 
Do you mind that they would not be handmade by me?

I'd really love to know what you think! 
Give me your feedback...

Please leave a comment below 
OR

Thank you!

Wednesday, 3 April 2013

What's On in Sheffield this weekend?

Well... since you ask...

...It's Mary's Marvellous Vintage and Craft Market!

This craft and vintage fair, based at St Mary's Church on Bramall Lane, is one of my favorite events to visit, as a seller AND a customer.

There is always a great atmosphere, the food is delicious and the eclectic mix of retro, vintage and quality craft means that it is very hard to leave the building without treating yourself to something!

This particular fair is important to me as it will be made by lolly's first outing of the season -  with the new Spring Collection of felt accesories making their 'real-life' debut.

As you may know I have been busy extending the range to include felt keyring/bag charms, hair accessories and craft kits which will co-ordinate with the badges, brooches and corsages I currently sell.

I am really looking forward to getting feedback from both old and new customers - so if you are in the area on Saturday 6th April pop in and say hello! 

As the poster says - you will see: 
'the very best of local arts and crafts and a jolly jamboree of vintage!'


Sunday, 24 March 2013

New Product: Craft Kit - Felt Flower Pin Brooch

The new products are arriving thick and fast this Spring...

...and the latest item to be added to the made by lolly collection of felt accessories is a do-it-yourself

Felt Flower Pin Brooch Kit.


If you have always fancied having a go at making your own made by lolly style 
retro felt flower pin brooch... now you can!

Cleverly packaged inside the recycled kraft card envelope you will find pre-cut felt pieces, contrasting thread, a polka dot button and a brooch pin - all you have to do is find a needle and you will have everything you need to create your own handmade felt accessory.

There's no need to worry if your sewing skills are a little rusty - the kit is suitable for anyone ages 10+ and the illustrated instructions mean that it's easy enough for even a novice to complete.

And if you are thinking of giving the kit as a gift, the square packaging will make wrapping easy - and as they are so flat they can be posted for the cost of a Large 1st Class stamp!

The Hot Pink version of the Felt Flower Pin Brooch Craft Kit can be purchased now from my online shop along with many other items from the made by lolly Spring Collection.


Saturday, 16 March 2013

What's New - Spring 2013

It seems a little ironic that in my last post 'A Sunny Weekend in Yorkshire' I was expostulating the need to take time off, to give yourself a break and to creatively re-charge the batteries...

Ironic, as that post was written back in November October (!) and since then I have been so busy I haven't even had time to blog!

So, what have I been up to?

Well, there's been Christmas Craft Fairs, New Stockists, Application Deadlines, Business Plans, Product Photography, Custom Orders... oh - and being made redundant from the day-job!

BUT... the biggest bit of news is that the made by lolly Spring/Summer 2013 Collection of felt accessories is now available from my online shop! This season's colour collection utilises Hot Pink, Lime Green, Soft Grey and Cooling Cream, and features some designs you may recognise - like the ever popular Blooming Petals....


As well as new brooch designs and colour combinations, like this Retro Ripple Corsage...


And.... New Product Lines too! 


I have recently introduced these layered retro style Felt Flower Hairbands and Keyrings
so now when I say that I design and make 'colour themed collections of felt accessories'
I can really mean it!

And that's just a small taster of the new range! Thanks for being patient in my absence  - I hope you feel the wait has been worth it! I also hope that now I have made contact again you'll be happy to stick around as there's so much more to come from made by lolly this year.

I'll be popping back soon with more updates, but if you really want to keep on top of what's happening in my wonderful world of felt accessories you will find I am regularly available on Twitter, Facebook and Pinterest (It really is a wonder that I get any work done, ever!)

If however, you are far to sensible to waste your time getting caught up in all the social networks and would prefer to hear my news in one handy monthly mail out, then enter your email address in the box below and you will be added to the mailing list for the made by lolly newsletter!


That's all from me for now! See you again soon!
Laura x

Related Posts Plugin for WordPress, Blogger...