Wednesday, 12 June 2013

Patchings Art Festival 2013 - during the event

Slightly later than promised... 
...but better late than never, here are some pictures of my stall set-up during 
Patchings Art Festival 2013!

As you can probably tell from the 'before' photos (see my previous blog post!) 
you are given a very generous pitch in which to set up your stall. 
In the end, I think I ended up with a spot approximately 8ft x 10ft - which could have seemed 
quite daunting, given the small size of things that I sell...


However, I had agreed to demonstrate while I was there, and having my second work table 
and all my equipment certainly helped to fill up the space nicely!


I had also decided that I wanted to offer customers the opportunity to have a go at 
designing their own customised take-away felt brooch kit.


 This pic 'n' mix approach was a hit with the customers...
 and if you include pre-made as well as take-away, then kits were the definite best seller! 

I am hoping to be able to refine this idea so that I am able to offer this service at all future craft fairs, but in the meantime, if you are desperate to have a go at some DIY crafting, you can still


Wednesday, 5 June 2013

Patchings Art Festival 2013 - before the event!

Packing for a craft fair can be difficult at the best of times - but what happens when the fair is four days long... and you're demonstrating too?

Well this weekend I will be taking made by lolly folded felt accessories to their first four day event, so I guess I'm about to find out!

I'll be exhibiting, and demonstrating in the craft tent at Patchings Art Festival in Calverton (near Nottingham) between 6th - 9th June 2013. As it's my first event of this length, I thought it might be fun to share some behind-the-scenes photos of my planning and preparation!

Packing the car. The impossible task...
Apparently, it turns out that you CAN fit the entire contents of my workroom, all my stock 
and some extra display equipment into a very small car and safely make it over the border 
from South Yorkshire into Nottinghamshire!

Made it! All unpacked at Patchings
Putting the tables together...
Tablecloth on, bunting up. We're slowly getting there!
Almost there...
A sneak peek at my 'make-your-own' brooch kit bar
I can't wait to see what it looks like once all the stock is out on show!

I do hope you'll pop back tomorrow to see the photos of the finished stall display...

...until then, 
goodbye!

Laura x

Monday, 27 May 2013

And the winner of the Poppy Galore Giveaway is....

....Comment Number 6


Congratulations to jkt 1965 for being the lucky winner!

It looks like you will be adding something else from made by lolly to your growing collection!

I shall be in touch to arrange delivery of your prize.


Many thanks to everyone who took part, and for your amazing feedback. I wish you all could have been winners! It's lovely to know you support the idea of making the Poppy Red Collection available all year round, and approve of my new badges :-)

And thank you too for the fabulous suggestion of making a Felt Poppy Hairband...
I will get to work and let you all know when they are ready for sale!

Thank you all for your support.
Laura x


Friday, 24 May 2013

Poppies Galore! and a free prize draw

 made by lolly red felt poppies are back for good!


Due to popular demand, I have decided to make both the traditional red felt poppy corsage AND 
the red felt retro style poppy corsage available all year round!

And in addition, I have created some poppy collectibles too!


Available to buy from my online shop, the 'Poppy Red' collection currently includes: 


I'd love to know what you think of the new items - and would also appreciate 
your suggestions as to any new poppy products that you'd like to see in the future...

So, as a little thank you, every person that takes the time to leave a comment offering feedback relating to the made by lolly 'Poppy Red' Collection will be entered into a free prize draw to win a Poppy Card with Badge (to giveaway to a friend) and a Poppy Badge (to keep for yourself!)

Please just check out the T&C's below before entering!

I look forward to hearing what you have to say!

Terms and Conditions:
  1. To enter, leave a comment on this post offering feedback on the made by lolly 'Poppy Red' Collection 
  2. You may comment on the current collection or new items you wish to see or both
  3. Only one entry per person. Multiple comments will be deleted, and only the first comment accepted.
  4. Feedback is welcome at any time, but only comments received between now and 5pm on Monday 27th May 2013 will be accepted for the prize draw
  5. Each comment will be assigned a number, and a random number generator will be used to pick the winner 
  6. I reserve the right to delete comments and exclude from the prize draw any persons that leave comments that are excessively rude or contain spam content
  7. The winner will be announced via this blog during the evening of Monday 27th May 2013, and the prize of one Poppy Card with Badge + one Poppy badge will be posted free of charge to the winner within 1 week of receiving confirmed address details.


Wednesday, 8 May 2013

How I inadvertently invented a marketing strategy...

Recently I have seen lots of blog posts and online magazine articles about the importance of marketing, and how getting to know your 'ideal customer' can help focus the direction in which your business is going.


I find reading these articles fascinating, as they are describing (in very helpful detail) a process I went through about a year ago.


...Only back then I didn't know I was creating a marketing strategy!


This is the story of how by finding my muse, I inadvertently created a marketing strategy that was the making of made by lolly!


When made by lolly first started back in 2010,  all I had was a hobby that had got out of hand.
I had no business plan, no branding and no idea where I was heading.

Two years pass. I teach myself how to blog, join Facebook and eventually Twitter too. I attend local craft fairs and set up online shops.  I learn how to take better product photos. I begin to develop a brand identity and focus on creating two new collections each year. I improve my packaging and display and hone my prices to achieve realistic profit.

I practice my craft and pride myself on the quality of the items I make.

But - there's a problem. I'm sitting at a craft fair in a cold damp hall, and the only potential customer that I've seen all morning is a soggy dog walker who has come in to get out of the rain. Even if she had remembered to bring her purse, (she hadn't) - this person was not my ideal customer.

That day made me realise that if my business (no longer an out-of-control hobby) was going to grow, I couldn't sit around hoping that a soggy dog walker would buy one of my felt accessories.

Think about it: How many times have you gone out to walk the dog and come home having bought a felt corsage?
Not many, I'm sure!

So, who was my ideal customer, and more importantly, where did she shop?
I used the rest of that unprofitable craft fair searching for my muse.

And I'm so glad I did, because although she is imaginary, and has no name, my muse (or 'ideal customer' if you prefer) has had more of an influence on the direction my business has taken than any other person!

Finding the Ideal Customer

These are the types of things I wanted to know:

  • Demographics: Gender, Age, Marital Status, Location, Education, Income
  • Personal Details: Height, Weight, Hair Colour, Personality, Style
  • Hobbies and Interests: Indoors or Outdoors?
  • Favourites: Book/Magazine/TV/Film/Music/Colour/Restaurant
  • Shopping Habits: Online or in person? Other brands?
  • Social Media Habits: Facebook/Twitter/Pinterest? 

But to be totally honest, for me the most revealing piece of information about my muse was working out which magazine she read. Isolating the elements of that particular brand and understanding where they were positioned in the market place, gave me a much clearer idea of where I was heading, and what I wanted to achieve. I worked out:

  • How trendy or traditional she was (from the styling and content)
  • How much disposable income she had (from the price of the magazine)
  • What kind of hobbies and interests she had (from the content)
  • Where she shopped and other brands she associated herself with (from the adverts)
  • What kind of product styling was in vogue (from the article photographs) 


Why was it so important to focus on a specific Ideal Customer? 


To persuade you how much easier things are with a muse, let me use this example:

When you are present shopping, which do you find easier:
Shopping for your best friend?
Or shopping for a distant relative who you see once or twice a year?

You know everything about your best friend.You know what colours and styles she wears, what she will like and dislike - and in fact you know her so well that you can anticipate how she will react when you show her something new.

Imagine that your 'ideal customer' is the best friend of your business.

How much easier would it be to make business decisions if you could already anticipate how your customers might react?

I have found that over the last year my muse has helped me make decisions on:

Colour Schemes | Pricing | Events | Product Display | Packaging | Social Media | 
Styling | Photography | Branding | New Products
 
 
To be totally honest - pretty much every area of my business! 
I now have a focus and an idea where my business is headed.
I have a marketing strategy and a business plan.
 
Plus I find my muse can be quite inspiring too. If I'm feeling stuck, I might put her favourite music on, or buy a copy of her favourite magazine to see if there are any new trends I should be aware of. Maybe I'll have a play on Polyvore and make her a new outfit (the high tech equivalent of those dress-up paper dolls I had when I was a child!)

Basically, I hang out with my imaginary friend! 

And do you know what?! It's the most rewarding and profitable relationship. Thanks to her my business is getting more exposure and I am making more sales. I have built a website. I have found the courage to apply - and get accepted - for bigger and more prestigious fairs.

But it is a bit of a one sided relationship - and sometimes I do feel 
like it's time I gave her something... 

 ...a name maybe?!

You can find the articles that inspired me to tell my story 
(as well as a lot more information!) by following these links:

 How to Find Your Target Market from the Etsy blog.

Positioning Yourself in the Market from Moyo Magazine, Issue 2 

your-one-most-awesome-customer from build a little biz
 
JUST FOR FUN... 
I'd love to know if you can guess what magazine my muse would read?
Or maybe you want to share something revealing about your Ideal Customer?

Please feel free to leave a comment below!


Thursday, 2 May 2013

Salt Dough Experiments - Coloured Salt Dough

Last week I had my first ever experience of salt dough.

Hard to believe, but true!

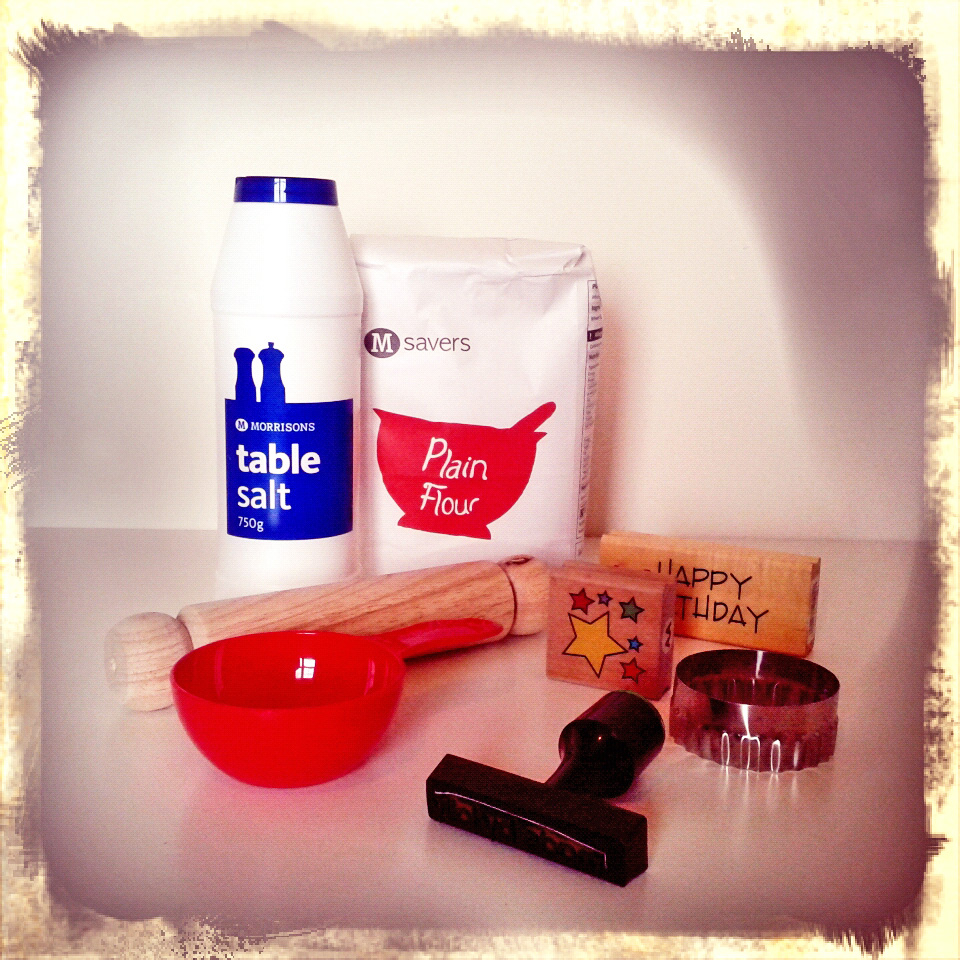
I started off with a basic salt dough recipe and some basic tools and equipment. The results were varied to say the least, but I didn't allow the lack of instant success to put me off!

According to my extensive research there are many different ways to vary the colour, texture and decoration of your salt dough ornaments - including oil, lemon juice, wallpaper paste, tea, coffee, paint, lace, stamps, buttons...


I haven't had time to try them all, but here are some of the results from my salt dough experiments:

How to make salt dough easier to handle
  • Add a few drops of vegetable oil to the basic salt dough recipe This will help make the dough soft and silky, and easier to knead    
  • Try not to add too much water. The salt dough should be soft and pliable, but never sticky otherwise it will be difficult to handle
  • Make sure you knead the salt dough for at least 5 minutes. The softer and smoother that your basic salt dough is, the better your finished items will look!
  • As I was making small and delicate items, I found it easier to work with only 1/4 of the dough at a time. Store the leftover salt dough under a damp cloth until you need it.
  • I covered my work surface with greaseproof paper to make it easier to move the dough after rolling out

Using coffee to make coloured salt dough

  • Add some coffee granules to a small lump of salt dough. Knead and manipulate the dough until the coffee granules have all blended into the dough (1.)
  • If you want a mottled effect, press more coffee granules into the surface of the salt dough (2.)
  • If you want a marbled effect, manipulate the dough until the coffee granules have only partially blended in (3.)
  • If you want a darker, solid colour, add much more coffee and knead very well to ensure the colour is evenly spread throughout the dough (4.)

Using acrylic paint to make coloured salt dough

  • Add some acrylic paint to a small lump of salt dough. Knead and manipulate the dough until the paint has blended in (1.) (You may want to wear gloves and protect your work surface during this stage as it can get messy until the paint has all mixed in!)
  • If you want a marbled effect, manipulate the dough until the paint has only partially blended in (2.)
  • If you want to add extra colour and texture, why not try adding some coffee granules to the coloured salt dough (3.)
  • Once rolled out the combination of the marbled paint and the coffee granules gives an amazing effect! (4.) 
I'm amazed by the results that can be achieved just by adding a few simple things to the basic dough - and somehow, I think that there may be many more things I have yet to discover about salt dough!

I'd love to know if you have any salt dough recipe recommendations, or any ideas for future projects...

Please feel free to leave a comment below - and who knows, 
it may inspire me to write a blog post about it!

Friday, 26 April 2013

How to Make Salt Dough - Basic Salt Dough Recipe

I'm just gonna say it.

Up until 2 weeks ago, I'd never made salt dough before. Hard to believe, right?

I can hear you asking...

"...Surely you had your first experience of salt dough was at pre-school, making jolly Christmas ornaments"
"...Maybe it was a rainy day activity that you tried with your younger brother?"
"...Well then, you must have made heart shaped wedding favours with your girlfriends?"

Nope! Not me.

A week last Sunday I found myself with an empty sewing basket, a tidy(ish) work room and some creative time to kill. I'd found a salt dough tutorial (by The Cheese Thief) that had been pinned on Pinterest (See the original tutorial here) and thought to myself.... I could do that!

And it turns out that salt dough is very easy to make, very cheap to make, and great fun!

So in case there is anyone out there that has never made salt dough ornaments before, here is the very basic salt dough recipe:

1 cup flour | 1/2 cup salt | 1/2 cup warm water

Mix everything together in a bowl

Knead the dough for at least 5 minutes to ensure all ingredients
are well mixed. 

You are aiming to end up with a dough that is soft and pliable, but not sticky. The longer that you work the dough, the easier it is to 
handle and the smoother the end result will be

PLAY!

Try using cookie cutters, stamps, inks... 
Why not try moulding the dough into 3D shapes?

Once you have finished, place your pieces on some greaseproof/waxed paper and allow to air dry for at least 3 days.

BE PATIENT! Try REALLY hard not to keep touching them and picking them up during this time. Salt dough can become brittle, 
and the more that you handle it as it drys, the more likely it is to snap.

Once your pieces are completely dry, (and this may take longer than 3 days....) you can smooth the surface with an emery board or some fine sandpaper, before varnishing them.


That was the basic salt dough recipe.

Perfect if you want simplistic and rustic salt dough ornaments. But what happens if you want something more sophisticated? Or want to add colour or decoration to your salt dough?

According to my extensive research (my thanks to Pinterest and Google!) there are many different ways to vary the colour, texture and decoration of your salt dough ornaments. Oil, lemon juice, wallpaper paste, tea, coffee, paint, lace, stamps, buttons...

There are so many salt dough variations waiting to be explored!

Check out my next blog post to see the results of my adventures with salt dough variations

OR...
maybe you might find some inspiration on my Pinterest board:


Related Posts Plugin for WordPress, Blogger...